실습
m10 서버를 한대 복제하세요. IP는 211.183.3.10


ssh-server에 첫 접속할 때 ‘yes’ 안 물어보는 거


# ssh-client의 설정파일, /etc/ssh/ssh_config 파일에서 위 내용을 no로 수정하고 주석을 해제하면 됨
앤서블에서는
--ssh-common-args="-o StrictHostKeyChecking=no"
앤서블 명령을 수행할 때 이런 옵션을 주면 됨.
ssh-copy-id -i ~/.ssh/id_rsa.pub root@211.183.3.10
[root@control_node ans]# vi 0307.inven

# 생성한 서버를 인벤토리에 등록하고

- 경로 설정도 중요함!
[root@control_node ans]# ssh-copy-id -i ~/.ssh/id_rsa.pub root@211.183.3.20
[root@control_node ans]# ansible m10 -m ping -i 0307.inven --ssh-common-args="-o StrictHostKeyChecking=no"
[root@control_node ans]# vi ~/.ssh/known_hosts
# 여기에 없는 대상을 확인하고 물어보는 게 StrictHostKeyChecking
# 이 파일의 211.183.3.10을 지우세요 = 한 번도 접속 안 한 상태로 돌아감.
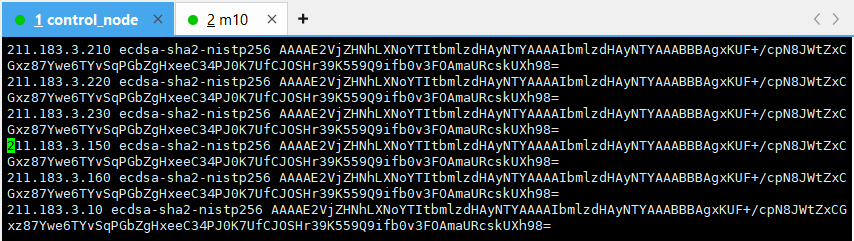
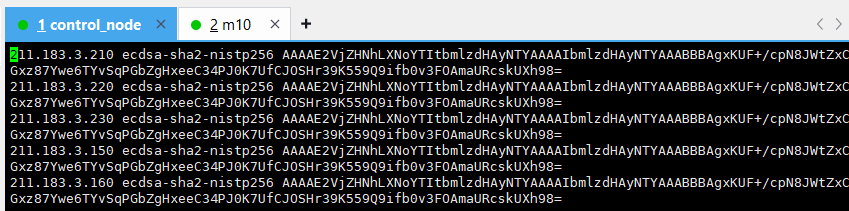
마지막에 있는 211.183.3.10을 삭제하고

# 인벤토리에 위와 같이 구성해 주자.

[m10]
211.183.3.10
[m10:vars]
ansible_ssh_common_args="-o StrictHostKeyChecking=no"
- 생성한 서버를 인벤토리에 등록하고

- 그럼 마찬가지로 yes를 묻지 않음.
debug 모듈
특정 변수의 값을 출력하거나, 메시지를 보여주는 모듈.
ansible_facts = 대상 노드의 정보를 가져옴.
ansible_facts 가 활성화 되어있어야 debug 모듈을 쓸 수 있음.
ansible_facts의 기본값이 원래 true기 때문에 굳이 false만 안 하면 된다.
[root@control_node ans]# vi debug.yml
# 대상 노드의 ansible_facts라는 변수(앤서블이 지정해 놓은 변수)의 값을 보여달라.
[root@control_node ans]# ansible-playbook debug.yml -i 0307.inven


- CentOS라는 단어가 포함된 줄만 필터링해서 가져와줘.라는 의미

- name: debug_pb
  hosts: m10
  tasks:
  - name: show_facts
    debug:
      var: ansible_distribution

# ansible_facts를 ansible_distribution로 수정.
register 모듈
- 모듈의 수행결과값을 변수에 저장하는 모듈.
[root@control_node ans]# vi reg.yml
- name: register_pb
  hosts: m10
  tasks:
  - name: ls_reg
    shell: ls #의 결과가 ls_result라는 변수에 저장
    register: ls_result #내가 정하기 나름 just word

  - name: show_ls_result
    debug: #특정 변수에 있는 값을 보고싶어
      var: ls_result
[root@control_node ans]# ansible-playbook debug.yml -i 0307.inven

- 특정한 변수(ansible_distribution)에 대한 값(CentOS)만 불러옴

- 실제로 m10에서 ls를 치면 이렇게 출력
when 모듈
- 특정한 상황이 충족 됐을 때 모듈을 수행
- ex) 만약에 리눅스 배포판이 CentOS면 yum을 통해 httpd를 설치하고, 배포판이 Ubuntu안 경우엔 apt를 통해 nginx를 설치하고 싶을 때
[root@control_node ans]# vi when.yml
# 배포판이 CentOS일 때 httpd를 설치.
- name: install_web_pb
  hosts: all
  tasks:
  - name:  install_httpd
    yum:
      name: httpd
      state: present
    when: ansible_distribution == 'CentOS'
    register: install_result1
  - name: show_result1
    debug:
      var: install_result1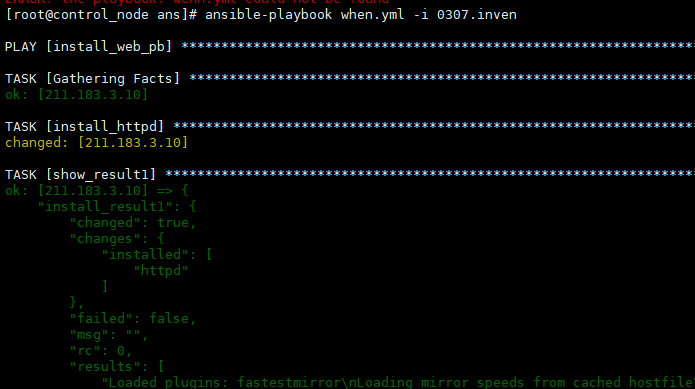

미니실습) 위 when.yml을 start-when.yml로 복사 후 web서버가 잘 동작하도록 만들고 접속이 잘되는지 테스트해 보세요.
- name: install_web_pb
  hosts: all
  tasks:
  - name: install_httpd
    yum:
      name: httpd
      state: present

  - name: restart_httpd
    service:
      name: httpd
      state: started
      enabled: true

    when: ansible_distribution == 'CentOS'
    register: install_result1
  - name: show_result1
    debug:
      var: install_result1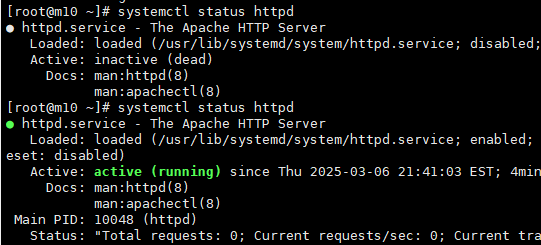
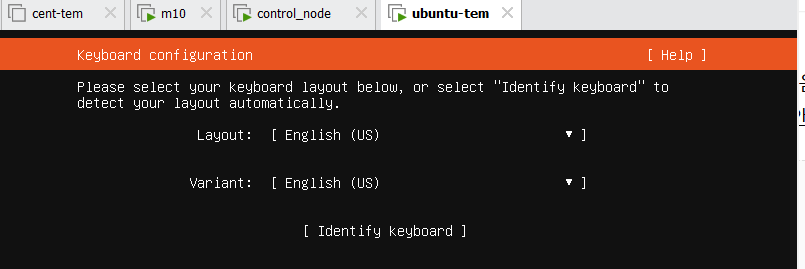
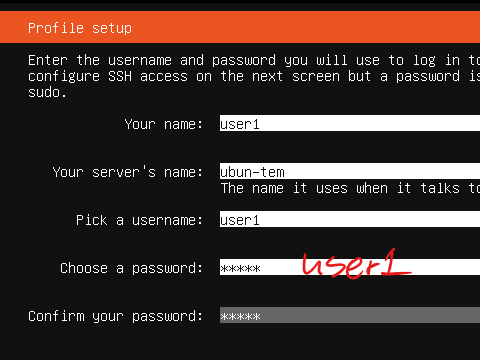
우분투 템플릿을 만들어 보자.
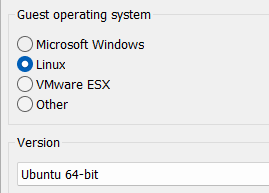

2 core, 2GB, 20GB, IP - 211.183.3.250/24

- 본딩, 티밍 = 다수의 NIC를 묶어주는 개념
-> 하나의 ip가 고장 났을 때 다른 ip를 쓰고 싶다든가, 아니면 하나의 ip로 묶어주던가 이런 경우에 사용함
- 대역폭을 늘리거나 active-standby 구조를 가져가고 싶을 때

- 본딩(리눅스), 티밍(윈도) = 다수의 NIC를 묶어주는 개념. 대역폭을 늘리거나 active-standby구조를 가져가고 싶을 때.


- x가 체크된 상태임

root@ubun-tem:/home/user1# vi /etc/netplan/00-installer-config.yaml
# ubuntu 20.04의 네트워크 설정 파일. ip를 수정할 수 있다.
root@ubun-tem:/home/user1# vi /etc/ssh/sshd_config
# ssh 루트 로그인을 허용하기 위해 설정 파일 수정

root@ubun-tem:/home/user1# systemctl restart sshd
# 재시작

# ubuntu에는 ufw라는 방화벽을 쓰는데, 기본적으로 비활성화되어 있음.
root@ubun-tem:~# apt update -y
root@ubun-tem:~# init 0
# 설정을 마친 후 shutdown 하여 앞으로 복제해서 쓰면 됨.

# m20으로 복제해서 우분투 서버를 하나 띄워보자.
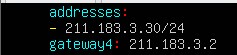
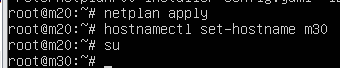
m20의 ip를 211.183.3.20/24로, hostname을 m20으로 해보자.
root@ubun-tem:~# vi /etc/netplan/00-installer-config.yaml

root@ubun-tem:~# netplan apply
# 네트워크 설정값 반영, centos7의 systemctl restart network와 비슷

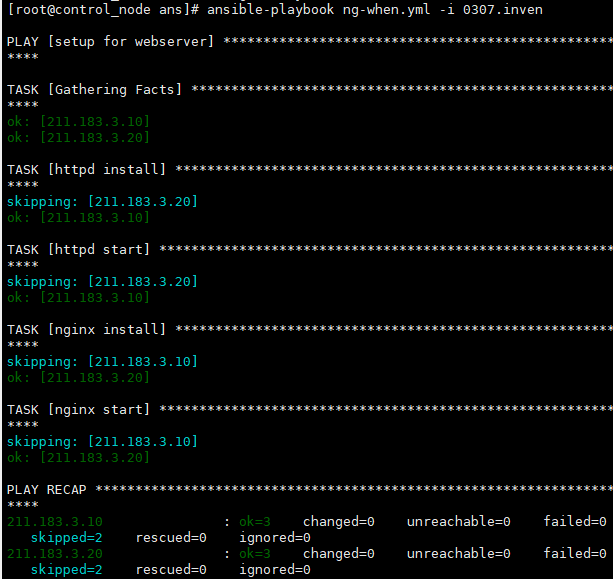
실습 1) 위 when.yml을 start-when.yml로 복사 후 ansible_distribution == 'CentOS' 면 httpd 설치해서 동작시키고, ansible_distribution == 'Ubuntu'면 nginx를 설치하여 web서버가 잘 동작하도록 만들고 접속이 잘되는지 테스트해 보세요.
[root@control_node ans]# vi 0307.inven

[root@control_node ans]# ssh-copy-id -i ~/.ssh/id_rsa.pub root@211.183.3.20

[root@control_node ans]# vi ng-when.yml
- name: setup for webserver
  hosts: all
  tasks:
    - name: httpd install
      yum:
        name: httpd
        state: present
      when: ansible_distribution == 'CentOS' #특정 조건이 참일때만 해당 작업을 실행하도록 하는 의미/ 위 조건은 현재 실행 중인 OS가 centOS일 경우에만 실>행하라는 의미임
      register: result # 작업 결과를 변수에 저장하는 기능
    - name: httpd start
      service:
        name: httpd
        state: started
        enabled: yes
      when: ansible_distribution == 'CentOS'
      register: result
    - name: nginx install
      apt:
        name: nginx
        state: present
      when: ansible_distribution == 'Ubuntu'
      register: result
    - name: nginx start
      service:
        name: nginx
        state: started
        enabled: yes
      when: ansible_distribution == 'Ubuntu'
      register: result
📌 when: 조건문
✔ when:은 특정 조건이 참(True) 일 때만 해당 작업을 실행하도록 하는 기능
✔ 위 조건은 현재 실행 중인 OS가 CentOS일 경우에만 실행하라는 의미
📌 register: 결과 저장
✔ register 없이 그냥 yum 설치 작업을 실행하면, 이미 설치되어 있어도 불필요한 실행이 일어남.
✔ register를 사용하면 httpd가 설치되지 않은 경우에만 실행하도록 제어 가능!
- 꼭 필요는 없음

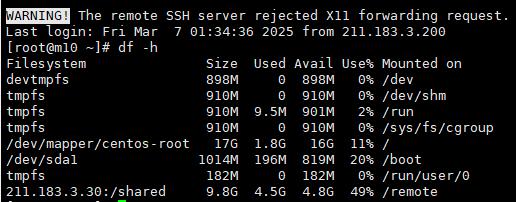
실습 2) 하나의 플레이북에서 CentOS면 nfs-client, Ubuntu면 nfs-server로 nfs를 구성해 보세요.
저번 블로그 실습 2를 보면 nfs-clinet랑 nfs-server랑 따로 ip를 설정해 줬는데 여기서는 따로 설정해 줄 필요가 없음.
왜냐하면 ubuntu랑 CentOS서버랑 다른 ip를 갖고 있기 때문임.
- name: Setup for NFS
  hosts: m
  gather_facts: yes
  tasks:
   - name: Install nfs-utils
     yum:
      name: nfs-utils
      state: present
     when: ansible_distribution == 'CentOS'
   - name: Install kernel
     apt:
       name: nfs-kernel-server
       state: present
     when: ansible_distribution == 'Ubuntu'
   - name: stop firewall
     service:
       name: firewalld
       state: stopped
       enabled: false
     when: ansible_distribution == 'CentOS'
   - name: make nfs_shared directory
     file:
       path: /shared
       state: directory
       mode: 0777
     when: ansible_distribution == 'Ubuntu'
   - name: configure /etc/exports
     lineinfile:
      path: /etc/exports
      line: "/shared *(rw,no_root_squash)"
     when: ansible_distribution == 'Ubuntu'
   - name: nfs service restart
     service:
       name: nfs-server
       state: restarted
     when: ansible_distribution == 'Ubuntu'
   - name: mount dir
     mount:
       name: /remote
       src: 211.183.3.30:/shared
       fstype: nfs
       state: mounted
     when: ansible_distribution == 'CentOS'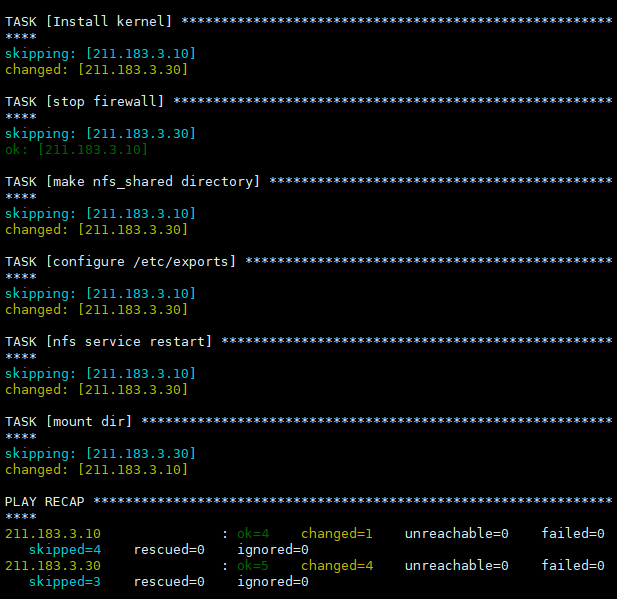
실습 3) CentOS의 경우 ssh 접속기록이 /var/log/secure 에 남는다. Ubuntu의 경우엔 /var/log/auth.log 에 남는다. ssh log를 control node의 /root/log 디렉터리로 받아오는 플레이북을 만들어보세요. fetch라는 모듈을 사용해서 해보세요.
- name: send log
  hosts: m
  tasks:
  - name: fetch /var/log/secure
    fetch:
      src: /var/log/secure
      dest: /root/log/cent.log
      flat: yes
    when: ansible_distribution == 'CentOS'

  - name: fetch /var/log/auth.log
    fetch:
      src: /var/log/auth.log
      dest: /root/log/ubun.log
      flat: yes
    when: ansible_distribution == 'Ubuntu'

handler
함수와 비슷 - 미리 내가 태스크를 정의해 두고 호출(notify)해서 사용. 변경사항이 발생했을 때(changed) 트리거 됨.
ex) httpd가 설치되면 => 서비스 태스크를 호출해서 httpd 데몬을 동작.
[root@control_node ans]# vi handler.yml
- name: handler_test_pb
  hosts: all
  tasks:
  - name: install_httpd
    yum:
      name: httpd
      state: present
    notify:
    - start_handler # 밑에서 이런 이름을 갖는 핸들러를 정의할 예정

  handlers:
  - name: start_handler
    service:
      name: httpd
      state: restarted
      enabled: yes

- 인벤토리 수정
m10
[root@m10 ~]# yum remove httpd
# m10에 httpd가 이미 설치되어 있다면 제거.
오류/ 해결 방안

- 오류가 발생함. 이 오류의 문제점은 hosts를 all이 아니라 cent로 해야 됨.
- 왜냐하면 내가 httpd를 전체에 설치해 준 것 이 아니기 때문에 cent라고 특정 ip를 선택해 줘야 되기 때문임
[root@control_node ans]# vi handler.yml
- name: handler_test_pb
  hosts: cent # 변경해줌
  tasks:
  - name: install_httpd
    yum:
      name: httpd
      state: present
    notify:
    - start_handler # 밑에서 이런 이름을 갖는 핸들러를 정의할 예정

  handlers:
  - name: start_handler
    service:
      name: httpd
      state: restarted
      enabled: yes
[root@control_node ans]# ansible-playbook handler.yml -i 0307.inven

- 웹서버가 설치 및 동작까지 된 걸 확인 가능
handler 실습) 새로 ubuntu 템플릿 하나 복제해서 211.183.3.30(m30)으로 만드세요. m30에서 웹서버가 동작하고 있습니다. 해당 서버로 파일이 복사되어 index.html 파일에 변경사항이 생겼을 때 웹서버를 재시작시키는 플레이북을 한번 만들어보세요.

root@ubun-tem:~# vi /etc/netplan/00-installer-config.yaml
[root@control_node ans]# echo test > test.html
# 플레이북과 동일한 경로에 test.html 생성

- name: play_handler_pb
  hosts: m30
  tasks:
  - name: install_nginx
    apt:
      name: nginx
      state: present
  - name: start_nginx
    service:
      name: nginx
      state: restarted
      enabled: yes
  - name: copy_index
    copy:
      src: test.html
      dest: /var/www/html/index.html
    notify:
    - restart_handler


  handlers:
  - name: restart_handler
    service:
      name: nginx
      state: restarted
[root@control_node ans]# ansible-playbook han-copy.yml -i 0307.inven

# 첫 실행 시 잘 동작

# 두 번째 동작시 핸들러 미실행
[root@control_node ans]# echo test111 > test.htm
[root@control_node ans]# ansible-playbook han-copy.yml -i 0307.inven
# test.html 파일을 수정 후 플레이북을 재실행하면 copy 태스크가 changed가 될 것
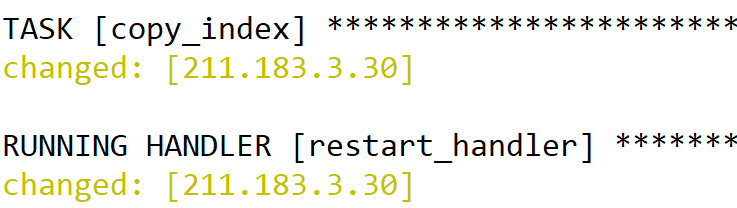
# copy 태스크에 변경사항이 생겨서 핸들러가 동작함

'AWS Cloud School 8기 > 서버가상화_클라우드 이미지' 카테고리의 다른 글
| Ansible/ IaC (Infrastructure as Code) (0) | 2025.03.07 |
|---|---|
| 서버 모니터링/ ggdG - 전부 삭제 (0) | 2025.03.07 |
| Open vSwitch/ openvswitch 실행 안될 때 (2) | 2025.03.06 |
| KVM(CLI) (2) | 2025.03.05 |
| KVM(Kernel-Based Virtual Machine)/ kvmnet (5) | 2025.02.20 |


